12 Features of Our Virtual Data Room You Didn’t Know
13 October, 2020 At ShareVault, our goal is to provide a tool that simplifies our customers’ lives. To that end, we are constantly improving our product and looking for ways to reduce the time it takes for administrators to set up and maintain their ShareVault, as well as expedite the end user experience so they quickly find what they’re looking for. Below are 12 ShareVault features that administrators may not be aware of, but that they’ll be glad to learn about.
#1 Managing Your Tag Hierarchy for Efficient Document Review
In ShareVault, your tag hierarchy resides on the left side of the Documents page. New tags are created by clicking on the “Add new tag” icon at the bottom of the page. Just click the icon and type the name of the new tag. When you’re done, hit Return and a new tag will be created eliminating the need to click on the “Add new tag” icon again. To indent a tag, creating a subtag, simply hit the Tab key. Hitting Shift+Tab outdents the tag, creating a higher-level tag. In this way, ShareVault provides easy and rapid keyboard shortcuts so you can type up your hierarchical structure quickly without moving your fingers off the keyboard.
Additionally, a tag hierarchy can be easily imported from any type of document. For example, your law firm or investment banker might have provided you with a due diligence list in Microsoft Word® or Excel®. This hierarchical structure can be imported into ShareVault.
Just be sure that indentation in Word is done by using tab characters to the left of each tag, and in Excel by using empty cells to the left of each tag. An indented tag (subtag) should have one more tab character or empty cell to the left than the preceding tag and an outdented tag has one fewer tab character or empty cell to the left than the preceding tag.
You can optionally create tag descriptions for each tag by adding one or more tab characters or empty cells to the right of the tag name, followed by the description on the same line. You can simply copy the text or cells of your hierarchical list, add a new tag in ShareVault and hit Paste in the field where you would normally type your tag name.
ShareVault will automatically create your tag hierarchy from the text or cells that you've pasted. If you included descriptions with your tag structure, they will be displayed just by hovering your cursor over the tag. You can also view and edit the tag’s description by selecting the tag and clicking on “Description” in the Properties pane.
Descriptions can also be added to documents by selecting a document and clicking on the “Description” tab in the Properties pane. Simply add a description and click “Apply.” The content of these descriptions will be searchable.
#2 Efficiently Upload Large Files
Publishing files and folders to ShareVault is as easy as dragging and dropping. We recommend using Chrome or Firefox when publishing files to ShareVault because they both support native drag and drop of folders. If you’re not using Chrome or Firefox, you can use the ShareVault Java uploader which loads automatically to compensate for browsers that don’t natively support drag-and-drop of folders.
 If you’ve got a very large structure to upload you can zip up that structure creating a zip file. When you drag and drop the zip file to ShareVault some new checkboxes appear at the bottom of the screen giving you the option to decompress the zip file after it’s uploaded and also to create tags from the folders that are in that zip file. This feature makes it very easy and quick to upload many or very large files to ShareVault.
#3 Change Permissions, Policies and File Settings in a Few Clicks
In ShareVault, you can select multiple tags by holding down the Shift key, or you can hold down control+shift (PC) or command+shift (Mac) to select a discontiguous set of tags (the same is true for groups and documents). You can then change permissions, add groups or change policies and those changes will apply universally to all the tags selected. These multi-select batch operations can save you many hours when reorganizing or repermissioning a large structure.
#4 Stage Permissions and Policies
When sharing documents during due diligence it can be handy to stage the sharing of that information as the project progresses and trust with the other party increases. With ShareVault, there’s an easy way to do that by creating “dummy” groups that have differing levels of permissions.
On the Users & Groups page create a new group and call it “Stage I Due Diligence” (or anything you like). Then click the Permissions tab in the Properties pane and set the permissions that make sense for stage I due diligence. Then do the same for Stage II Due Diligence and Stage III Due Diligence.
Remember, these are dummy groups so they won't contain any users. Then when a party has finished with stage I due diligence, for example, simply select that group and choose “Copy permissions and policies from…” in the Properties pane and select the dummy group “Stage II Due Diligence” and the permissions and policies that you assigned to that group will be applied to the group you selected. It’s a quick and easy way to promote a group from one stage of due diligence to the next.
#5 Customize Entry Pages
Most ShareVault users will likely only have one confidentiality notice, however, it’s possible to have more if the need arises. As an example, let’s say you have potential industrial partners and potential financial partners and you want them to agree to different confidentiality notices. Go to the Admin page and click on the Entry Pages tab. Create a new entry page and name it “Industrial Partners.” Do the same for financial partners. Then from the pull-down menu to the right simply select the groups that are appropriate for “Industrial Partners.” All other groups will automatically be routed to the entry page for “Financial Partners.”
#6 Set Customized Documents Security Policies
If you’re a ShareVault administrator, you know how to set security policies to prevent printing, saving and copy/paste, but did you know that you can configure policies to prevent screenshots as well? From the Admin page click on the “Settings” tab and turn on Screen Shot Blocking. A message will appear telling you that in order to enable screenshot blocking your users will have to download and install ShareVault Reader. When a user clicks a document they will be prompted to install the software. Now, click on the Policies tab and you’ll see that “Disable Screenshots” has been added to your list of policies as an option. It's unchecked by default, so don't forget to enable it for one or more of your policies.
Another feature on the Policies page is setting expiration dates for documents. This can be useful for enforcing deadlines. From the Policies tab simply click the box next to “Expiration” and you’ll be prompted to set a date and time for expirations. All documents that have this policy assigned will no longer be available after the expiration date. Expired policies remain in the policy list only for your reference, but are no longer active, so you can delete them with no consequence.
#7 Batch Download and Batch Print

If a users' policy allows for saving or printing of documents, then the batch download and batch print features can be real time savers. An end user can select multiple documents in the file list and then two buttons will appear above the file list: batch download (zip icon) and batch print (printer icon).
A batch download will zip all of the selected files into a single zip file and then download the zip file to the user's computer. If the selected files are protected using PDFtrak, the files within the zip file will be encrypted PDFs that will only open if the user has an active ShareVault login session and still has permission to the files. This allows you to retroactively revoke the rights of the user to open the document, keeping you in control of your confidential information.
Batch print will prepare a single document by merging all of the files in sequential order. There are options to include a table of contents, page numbers and/or separator pages. Documents protected by PDFtrak will be printed securely via ShareVault Reader, which will open to print the document, and then immediately close the document. ShareVault Reader blocks printing to PDF or other image formats, so you retain control over the digital document.
#8 Create Documents with Hyperlinks to Files
If you would like a document published to ShareVault to contain hyperlinks to other documents those hyperlinks can be preserved in ShareVault. Simply create a folder that contains the original document as well as the documents that are hyperlinked. Then, using Microsoft Word's Hyperlink feature under the Insert menu create hyperlinks to the other documents. Then simply publish the folder to ShareVault and those hyperlinks will be preserved.
#9 Single Sign-On
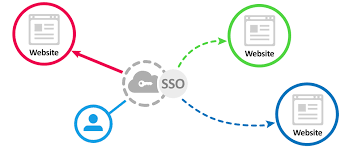 You’ll have to work with your IT department to enable Single Sign-On. It’s possible that every day you may log in into OneLogin, Okta or some other identity provider (IdP) which is a standard software that many mid to large-sized companies have in their IT structure. Simply click the SSO tab on the Admin page and have your IT department fill in the required fields. Click Save and you’ll be able to log in to ShareVault with a single click from your IdP provider’s page.
#10 Two-Step Verification
From the Admin page click the Authentication tab. Enable Two-Step Verification. You can then decide how often Two-Step Verification will be required and if it should be required for all existing users. This can be customized for individual users on the Users & Groups page by clicking the 2SV checkbox next to a user’s name. Once enabled, users will need to enter a code received by text message or authenticator app in order to log in to ShareVault. Enabling 2SV is a quick and easy way to further harden your ShareVault against unauthorized access.
#11 External Integrations & Sync
From the Admin page click the Connectors tab. You’ll be given the option to add connectors to Office 365, DropBox, SharePoint and/or Box. After a quick and easy configuration, you’ll have the ability to sync files or folders from these platforms to your ShareVault account and then use that synced folder, through ShareVault, to share externally with the higher degree of security that ShareVault provides.
#12 DocuSign Connector for eSignature Workflows
 Once DocuSign is enabled, you can use all its features right from within ShareVault. Simply select a document from the Documents page and click the pull-down menu on the right. Select “Send to DocuSign” and the document will open up right within ShareVault with the DocuSign workflow. You can add recipients and all the standard fields that DocuSign provides. When you’re done, hit Send, and the document goes through the DocuSign workflow. After the document is signed it will come back into ShareVault signed and ready for further review.
Wrap Up
In this article, we prescribed 12 features of ShareVault that makes it a unique virtual data room solution among available alternatives. A full demo of all these ShareVault features is available in video format. Click the link below for a personalized demo of ShareVault.